Quick start guide
Logging in
- When the app is first opened (or you've logged out) you'll be presented with the start screen.
- Follow the 'Get started' or 'Log in' links at the bottom of the page.
- Log in is handled by Google. On successful log in you'll be taken to the home screen - the Garden List.
Viewing Gardens
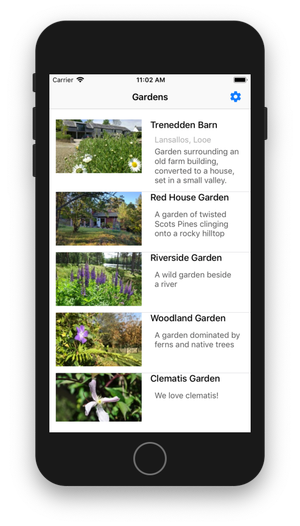
The home screen is the Garden List. Here you can see all of the gardens you can view, which are:
- Gardens shared publicly, which all GardenMap users can see
- Gardens that friends have shared with you
- Gardens that you have created in GardenMap
Tap on a garden in the list to explore!
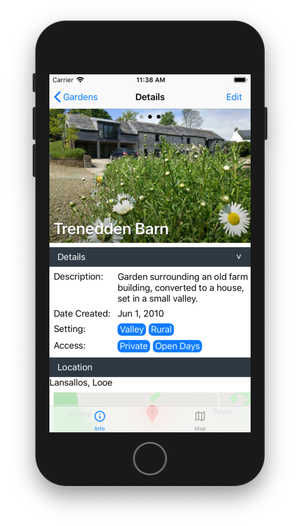
- Details for the selected garden are shown
- TIP: Swipe the header image to view the garden photo slideshow, tap the image to view the slideshow full screen
- Switch to the garden map view from the bottom navigation bar
Logging out
- Note: It's not necessary to log out, it's fine to remain logged in between sessions
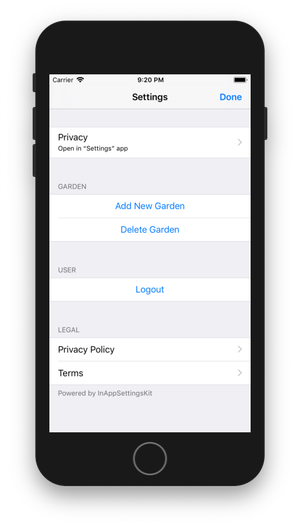
- From the garden list home screen tap the settings button in the top right to open the settings screen
- Select the log out option
Editing the garden map
Good to know
The garden map structure is constrained by some simple rules. The interface enforces the rules, but it helps to understand what they are:
- The map starts with a boundary
- The map is built up of a nested structure of objects, Objects can have child objects within them, they are contained within a parent object, and there may be other sibling objects within the parent
- Objects must remain within their parent object
- Objects may not overlap sibling objects
GardenMap splits plants into two groups, based on how they are displayed on the garden map:
- 'Feature Plants': Plants that are plotted on the map individually, because of their importance (structural or emotional!)
- 'Plants': Plants (that are still important), but would take too much time (and would clutter the map) if plotted individually.
The garden map is built up using the following types of objects:
- 'Boundary': This is the first object in the map - it matches the real world outer boundary of the garden. Only 'Areas' can be placed inside the Boundary
- 'Areas': Areas of the garden that contain plants. Areas can contain other Areas, Structures, Plants, and Feature Plants. So, Areas might be 'Front Garden', 'Back Garden', 'Lawn', 'Bed' etc.
- 'Structure': Areas of the garden that don't contain plant, like paving, the shed, or the house
- 'Feature Plants': Plants that are plotted on the map individually, because of their importance (structural or emotional!).

Editing the map
- Enter edit mode: tap 'Edit' in the top right of the Garden Map view.
- Exit edit mode: tap 'Done' in the top right to confirm changes, or tap 'Cancel' in the top left to discard all changes in the current edit session.
Editing with the Toolbar
 Clear Selection
 Edit Content
 Details
 Add
Add Feature Plant
 Plant
Plant Planting Area
 Delete
 Edit Outline
 Move
Move Stretch
 Rotate
 Point Edit
 Add Point
 Delete Point
 Minimise
 Close
Close